Step-by-Step Guide to Creating Your Profile
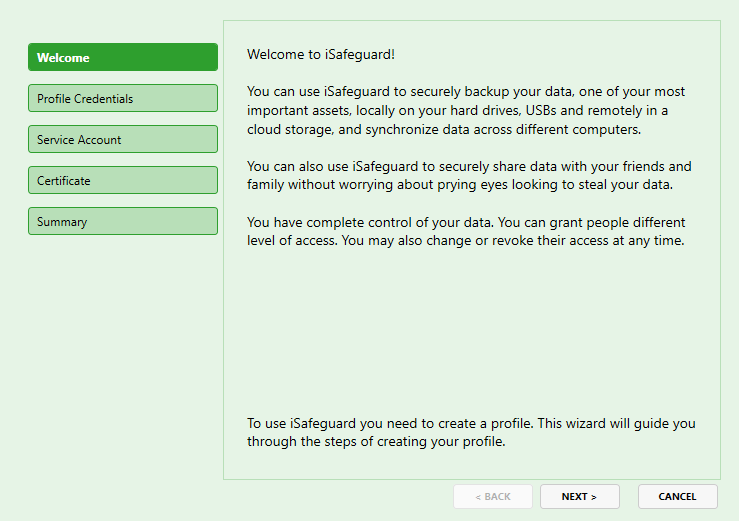
Every time you run the software you will see the following screen.
![]()
Step 1: Launch QuickStart Wizard
Since this is the first time you run the software and you don't have a profile, go ahead and click the link click here close to the bottom of the screen. The QuickStart wizard will be launched to guide you through the steps of creating your profile.
Click Next to move to the next screen.
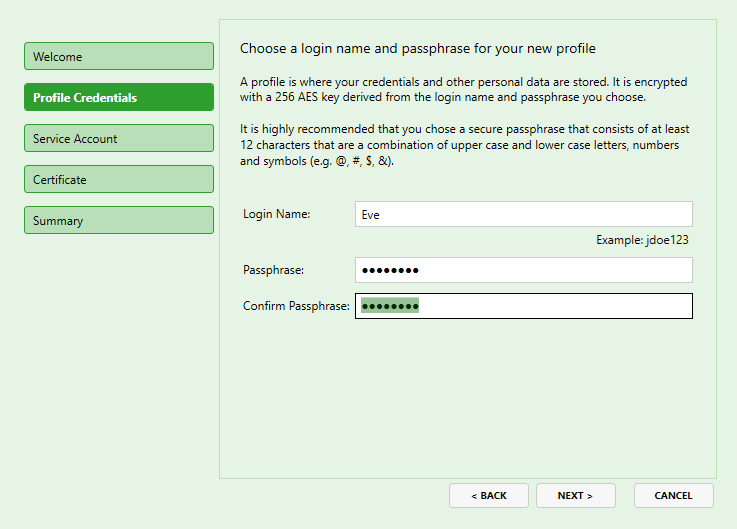
Step 2: Choose Profile Credentials
In this step you choose a login name and a passphrase. You will need both of them to unlock to your profile in the future. Be sure to choose a login name you want to use because you won't be able to change it once the profile is created. For the security of your profile we highly recommend that you choose a strong passphrase to ensure no one except you can unlock your profile.
Click Next to move to the next screen.
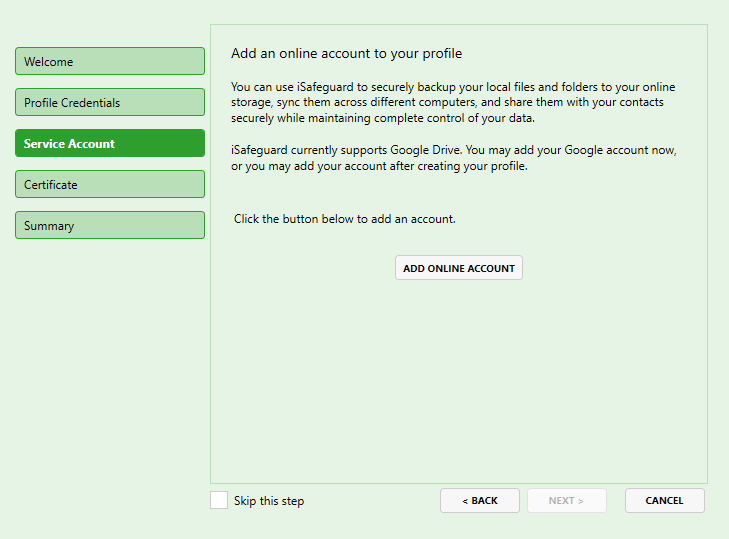
Step 3: Adding an Online Account
In this step you will add your Google account to your profile, and authorize iSafeguard to access your Google Drive and your Google contacts. Click Add Online Account as shown in the following screenshot.
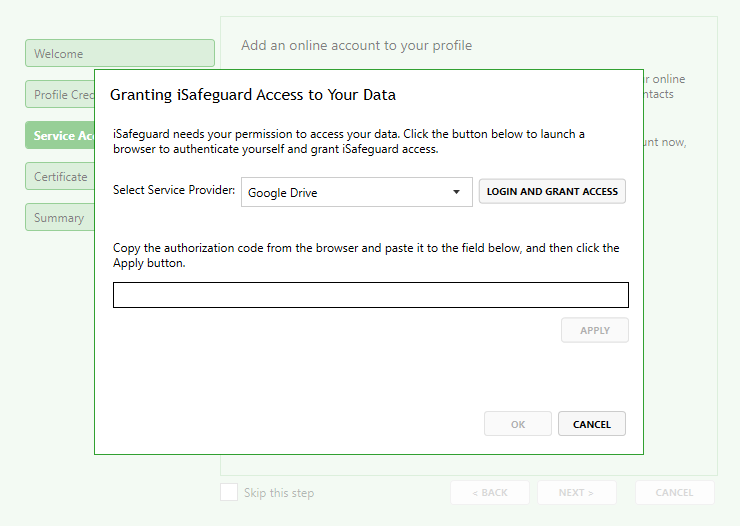
In the Granting iSafeguard Access to Your Data dialog as shown in screenshot below click Login and Grant Access button. The default browser installed on your computer is launched..
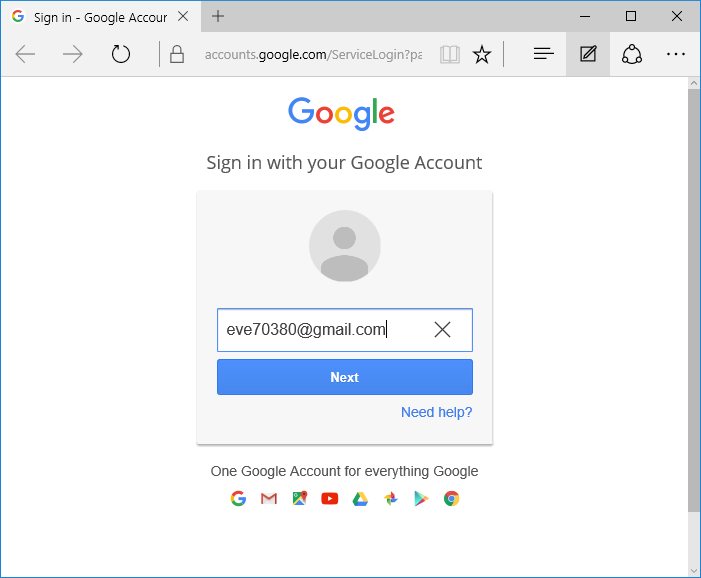
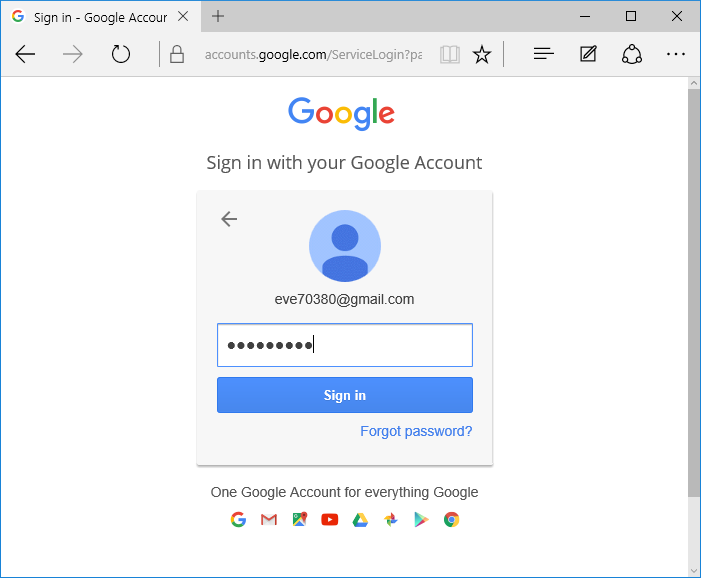
Sign in with your Google account in the browser windows shown in below screenshots.
Note: you may not see one or both of the screenshots below if you have already signed in.
Click Next to move to the next screen.
Once signed in Google will ask if you want to grant iSafeguard permissions to access your data as shown in screenshot below.
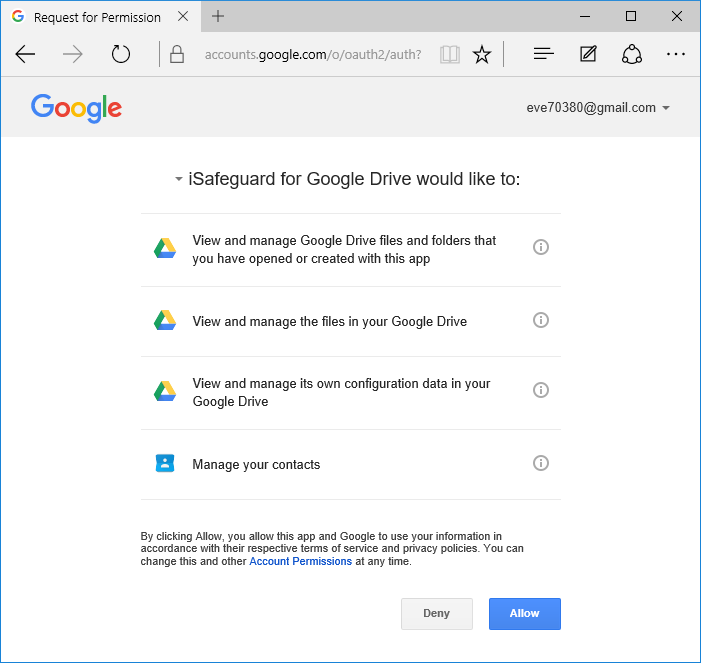
Click Allow. Google then displays the authorization code in the browser with a brief instruction.
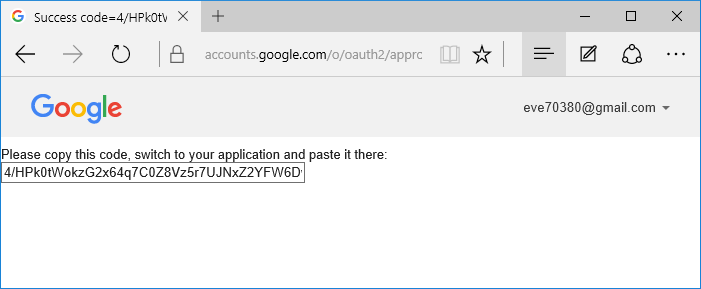
Copy the code in the browser window to clipboard, and then switch back to iSafeguard, and finally paste the code in the field right above the Apply button.
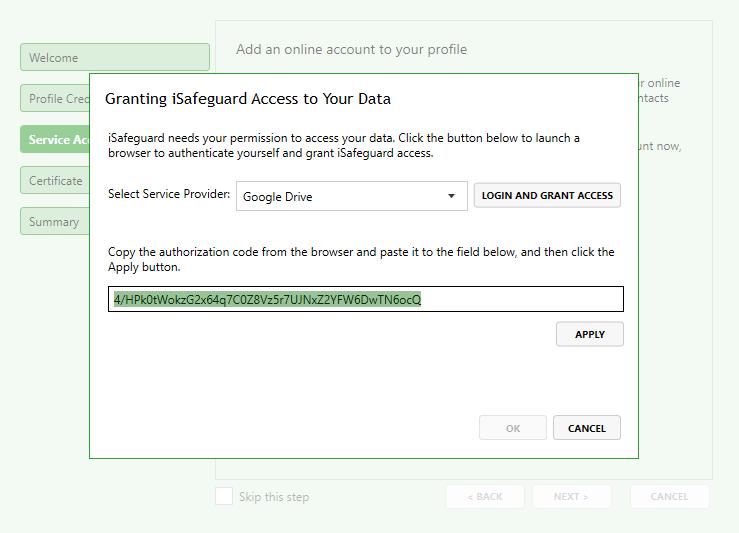
Click the Apply button. It may take a moment before OK becomes clickable.
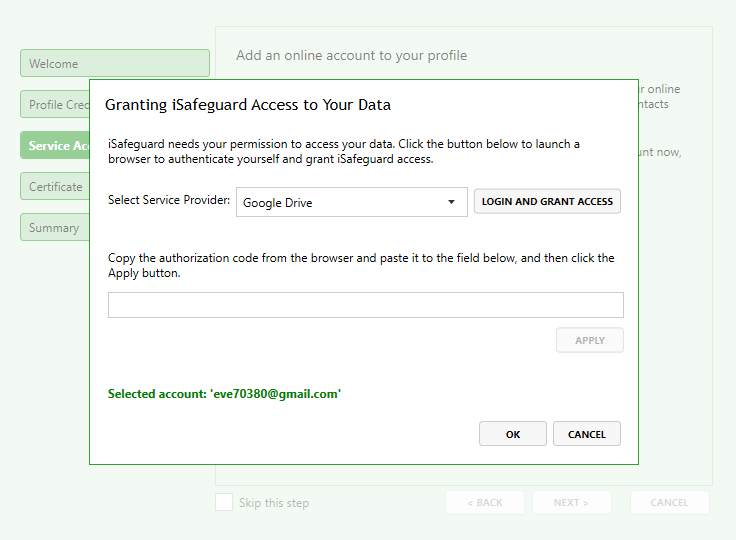
Click the OK button once it becomes available. Now you have added your Google account to your profile, and granted iSafeguard access to your data.
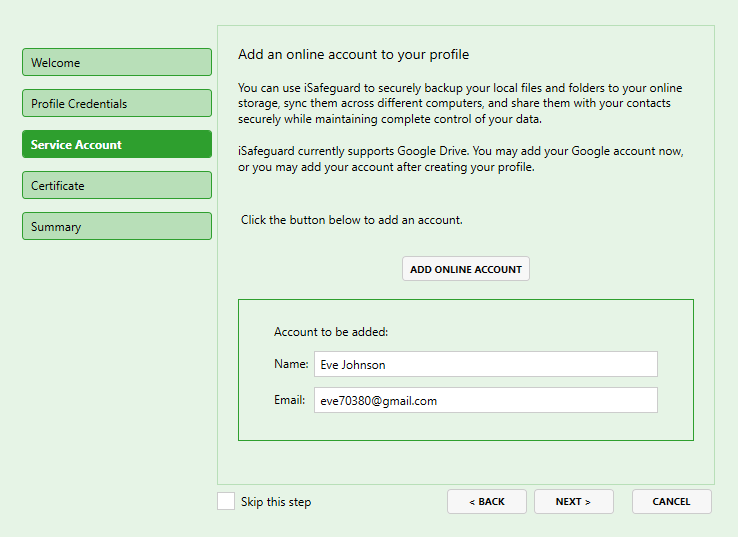
Click the Next button to move to the next step.
Step 4: Adding a Certificate to Your Profile
In this step you have two options (1) creating a new certificate and adding to your profile, or (2) importing an existing certificate to your profile. We are going to create a new certificate in this guide. Now select Create a new certificate, if not already.
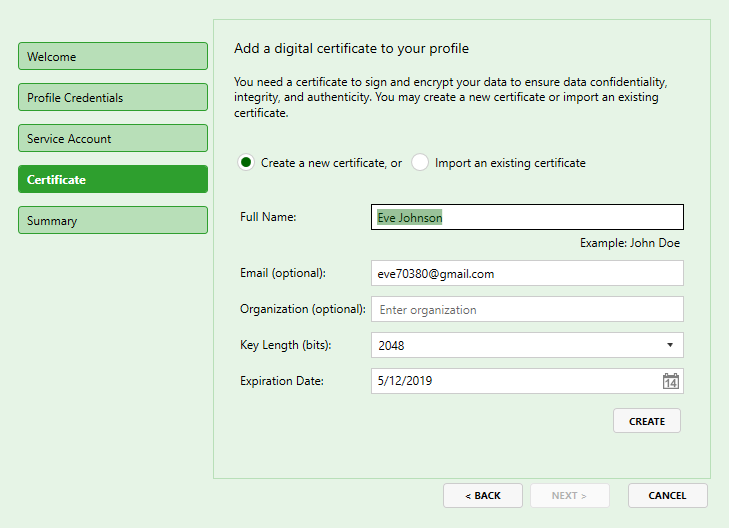
Click Create after filling the fields with desired values. By the way the default values should be good for most users.
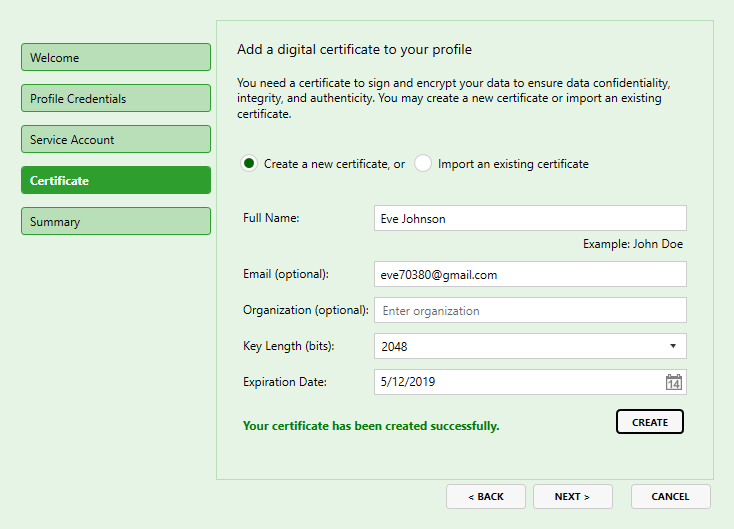
Click Next to move to the next screen.
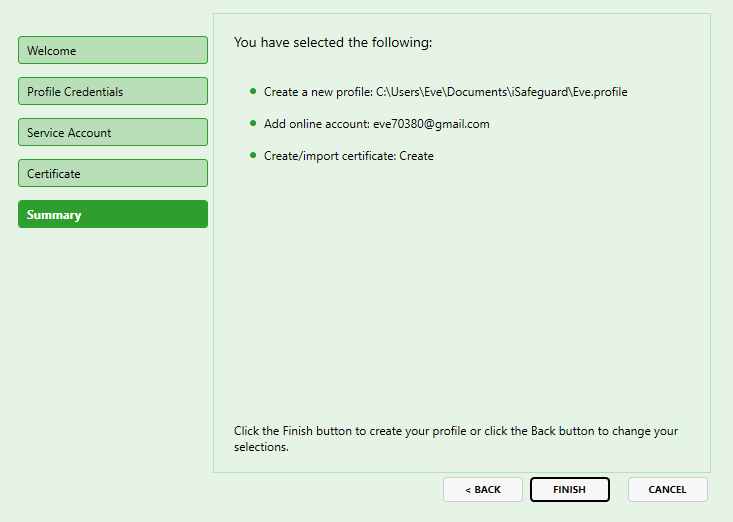
Step 5: Creating Your Profile
At this point the wizard has collected the information it needs to create your profile. Click Finish to create your profile and login to your newly created profile.
Now iSafeguard is ready to backup your data and to share data with your contacts securely.
Next check out the Step-by-Step Guide to Backing Up Your Data Securely.