Step-by-Step Guide to Backing Up Your Data Securely
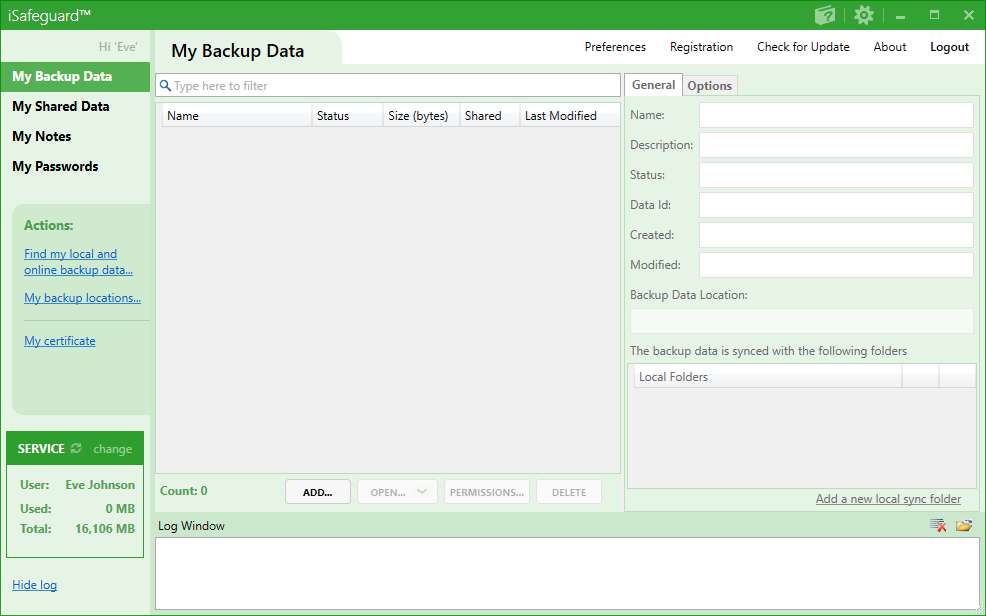
To backup your files and folders to a remote location, such a network drive, a cloud storage, or an extern USB drive. Click My Backup Data as shown in screenshot below.
Step 1: Launching Backup Wizard
To start a backup click the Add button, and you will see the welcome screen of the iSafeguard Backup Wizard.
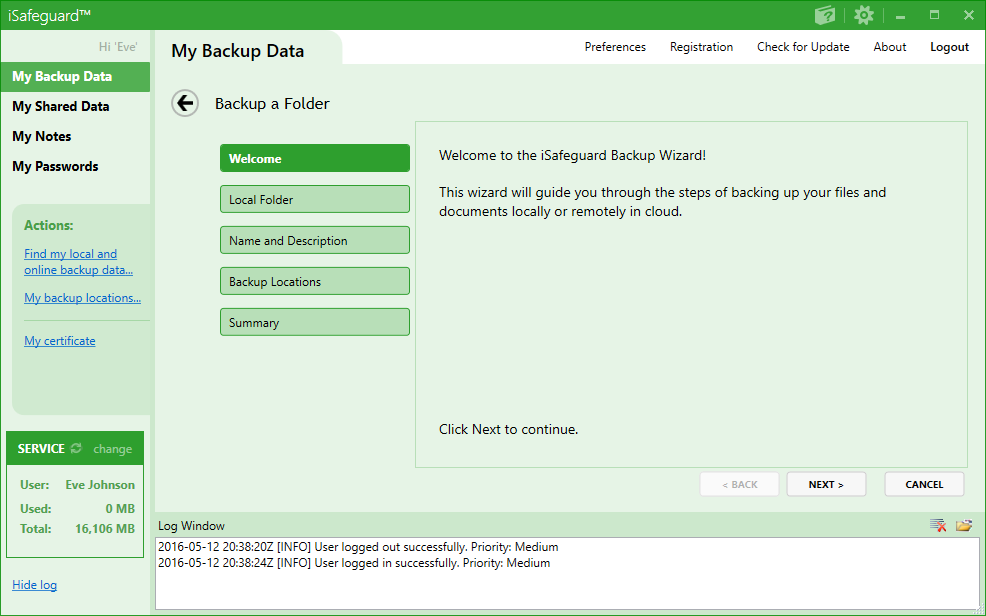
Click Next to move to the next screen.
Step 2: Choosing a Folder to Backup
Enter the folder's full path in the Local Folder field, or click the browse button
 to choose a folder.
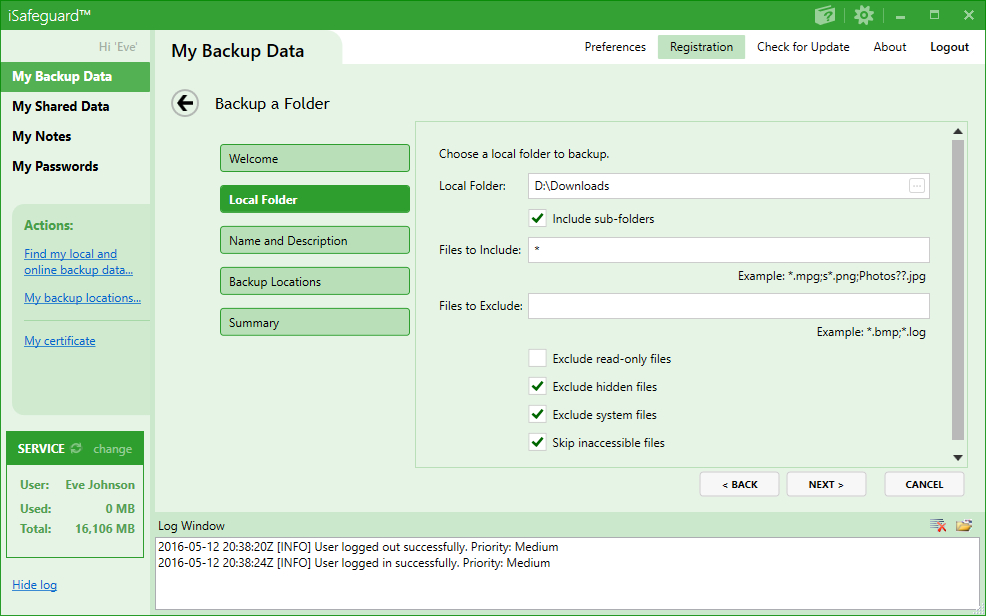
Click Next to move to the next screen.
Step 3: Adding a Name and Decription
In this step you will give a name and a description of the backup data. By default the name of the backup data is the name of the folder you have selected.

Click Next to move to the next screen.
Step 4: Choosing a Backup Location
In this step you choose a location to store the backup data. You may choose a local storage, or cloud storage (Google Drive). Select Backup to cloud storage to backup the selected folder to your Google drive.
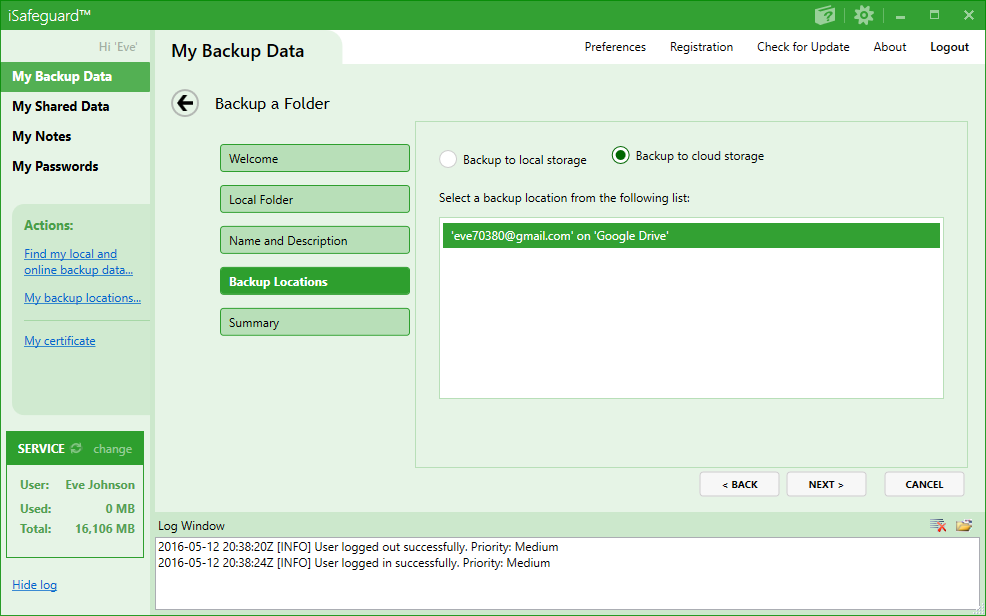
Click Next to move to the next screen.
Step 5: Backing Up Your Data
Now the wizard has gathered all needed information to backup your data.
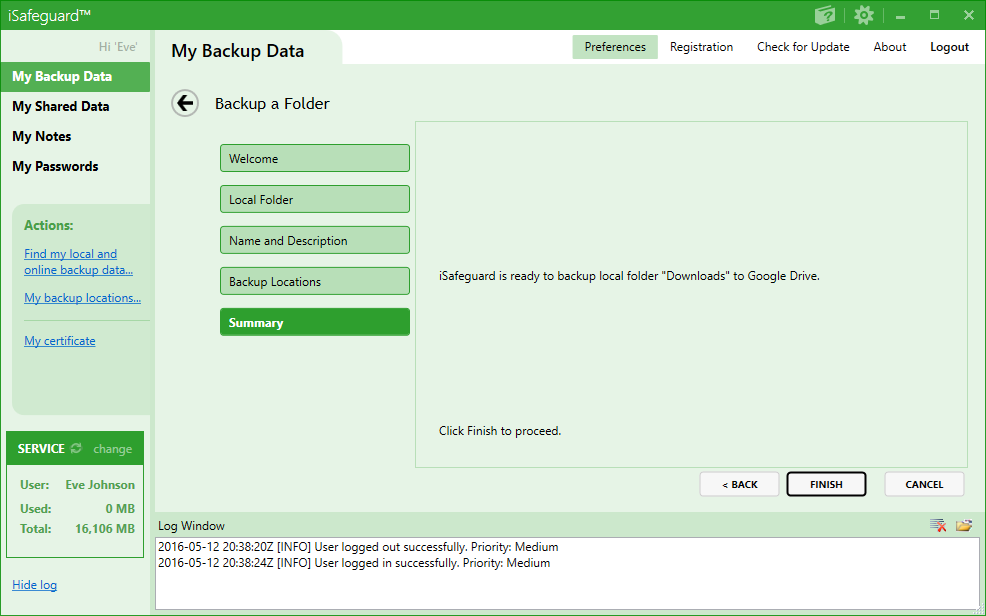
Click Finish to close the wizard and to start the backup process. The backup progress is displayed as shown in screenshot below.
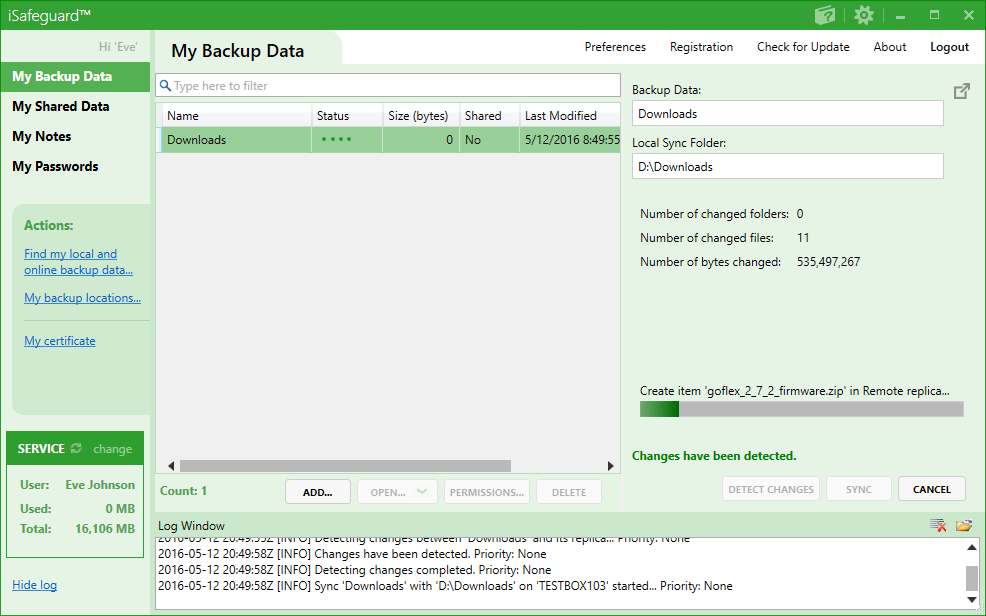
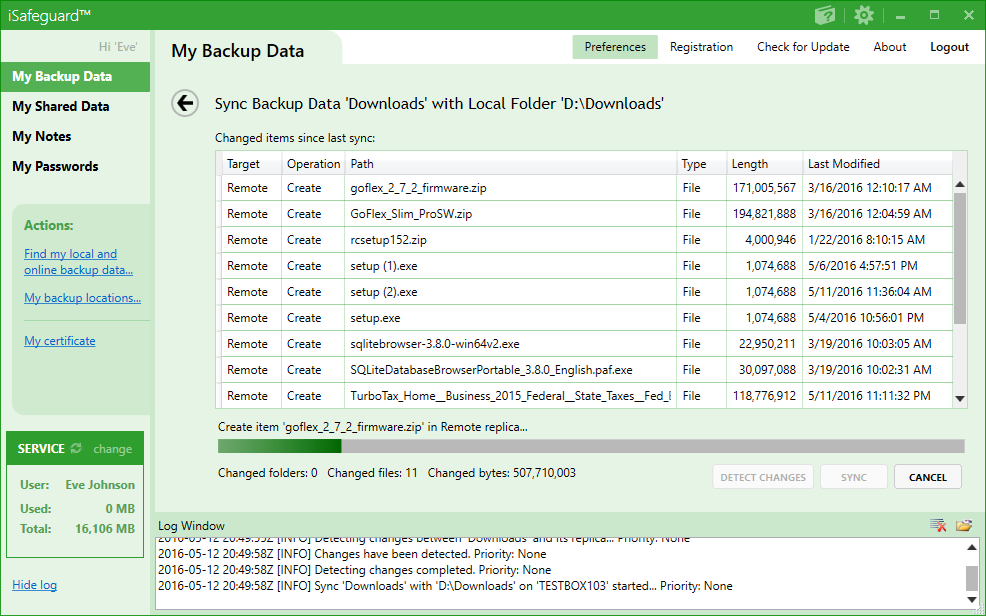
To see more details click the Pop out icon  and you will see the following screen.
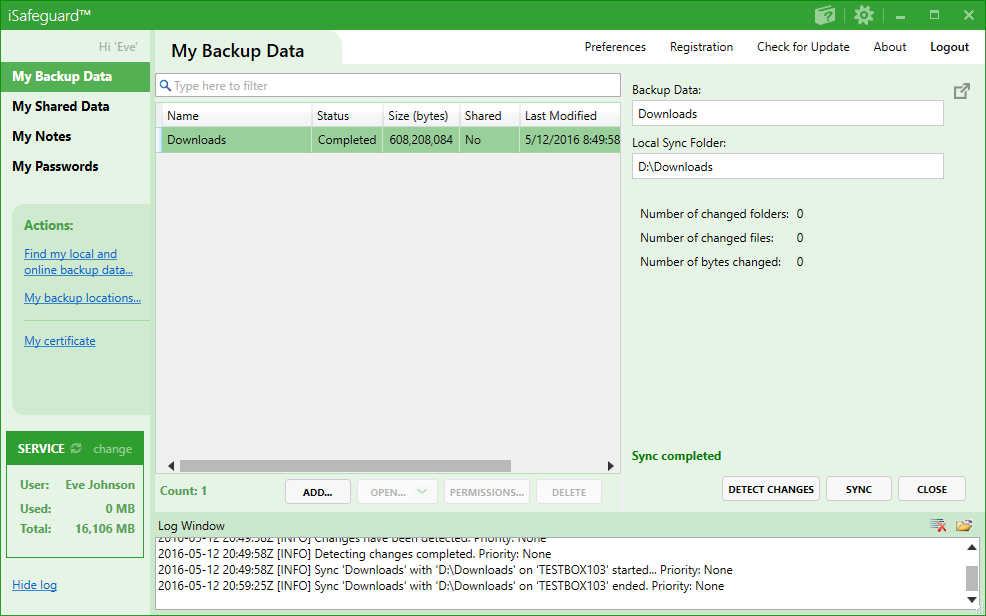
Once the backup is completed the following screen shows.
Step 6: Examining Your Backup Data
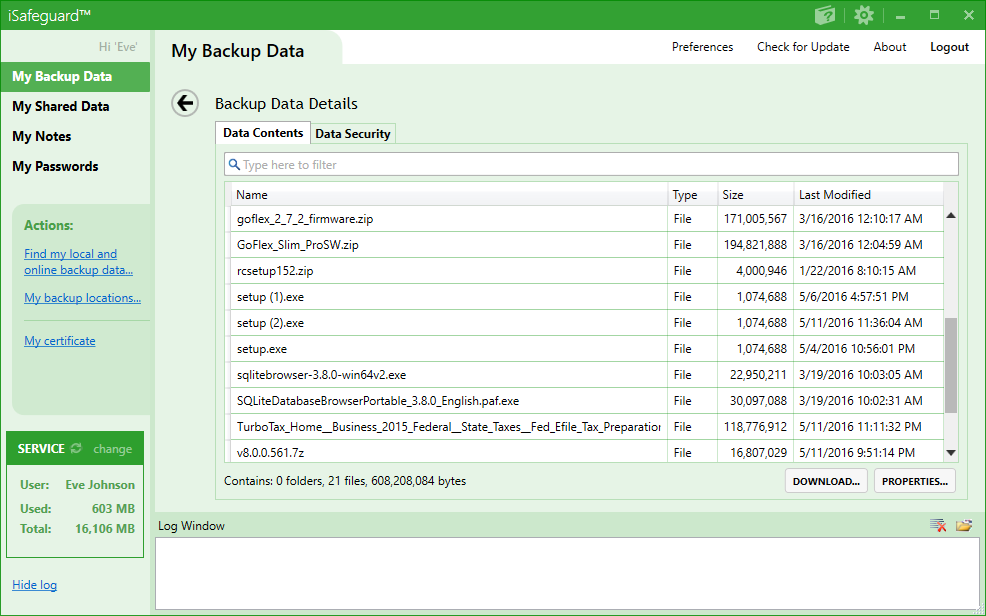
Now that your data has been backed up to your Google drive successfully let's examine your backup data. Click Close to dismiss the progress view, and the Open button should be enabled. Click the Open button while the backup data named "Downloads" is selected. You will see the following screen.
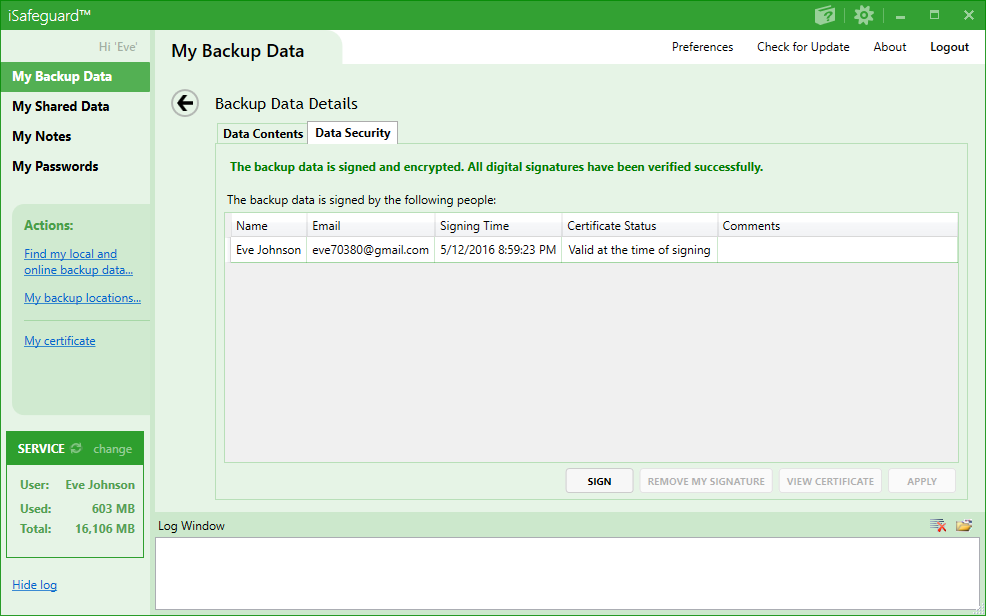
Now click the Data Security tab. You will find the information about the digital signature(s).
Next check out the Step-by-Step Guide to Sharing Your Data with Your Contacts Securely.